Become a professional master in Microsoft Word by learning these useful tips and tricks to help you management your emails better and work more productivity.
Table of Content
- CTRL Key Shortcuts
- Save as PDF
- Scroll Zoom
- Add a Horizontal Line
- Shrink One Page
- Have Word Read To You
- Add Random Text
- rand()
- rand(paragraphs,sentences)
- lorem() (for Latin Text)
- Convert Text to Table
- Insert Hyperlinks
- Insert Date/Time
- Insert a File Path/Location
- Insert a Screenshot/Screen Clipping
- File Share Email
- AutoCorrect
- Triple Click to Highlight a Paragraph
- Show Formatting Marks
1. CTRL Key Shortcuts
In Microsoft Word, the CTRL key can be used to navigate through your document more efficiently.
- Hold CTRL and press Right Arrow to go right one word at a time.
- Hold CTRL and press the Left Arrow to go left one word at a time.
- Hold CTRL and Backspace to delete a whole word at a time.
- CTRL + SHIFT + Right Arrow will highlight one word at a time
- CTRL + END to move cursor to the end of the line.
- CTRL + HOME to move cursor to the beginning of the line.
- CTRL + Page Up to move up one page.
- CTRL + Page Down to move down one page.
- CTRL + UP Arrow to move cursor up one paragraph at a time.
- CTRL + Down Arrow to move cursor down one paragraph at a time.
2. Save as PDF
If you need to share your document in a fashion that can not be edited by others and will preserve the pagination and formatting as you've designed it, save it as a PDF. This file format (Portable Document Format) was developed by Adobe in the early 1990s as a way for people to share documents and have it appear exactly the same no matter what computing platform is use to view it from. There are other benefits of PDF as is the defacto standard for business documents.
Follow these step to save your Microsoft Word document as a PDF:
- Open the Word document you want to create a PDF of.
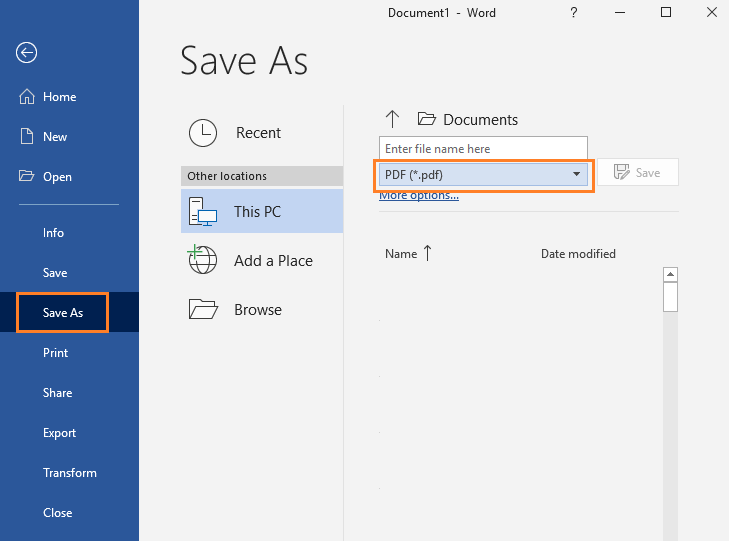
- From the menu bar, click File > Save As, as highlighted in the illustration below.
- From the drop-down list, find and select PDF (*.pdf) and then click Save.
3. Scroll Zoom
You can quickly zoom in and out of your Microsoft Word document with this easy keyboard and mouse combination.
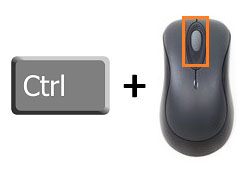
- Press and hold down the CTRL key on your keyboard.
- Then scroll your mouse wheel forward and backward to zoom in and out, respectively.
4. Add a Horizontal Line
Easily add a horizontal line across your page, extending from the left margin to the right margin, by typing three hyphens (---) and then pressing Enter
In Word, a horizontal line is a type of border. To delete it, perform the following:
- Place the cursor immediately above the horizontal line.
- On the Home tab, click the arrow next to the Borders and Shading button.
- Click No Border.
5. Shrink One Page
As you finalize your Word document, you may find yourself with the last page looking a bit odd by it having just only a few lines of text. You can use the Shrink One Page feature of Microsoft Word to easily have it attempt to adjust your document to include those few lines of text without having to print that last extra page. It does this by reducing the size and spacing of your text with adversely affecting the overall presentation of your document.
Before using this feature, we'll need to make the Shrink One Page icon accessible to us on our Quick Access Toolbar by performing this one-time setup:
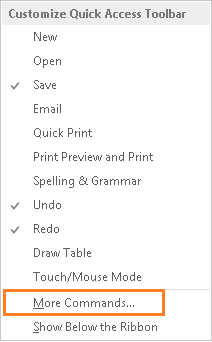
- Click on the down arrow on the Quick Access Toolbar.

- Select More Commands from the list of options that appears.
- In the Word Options dialog box, from the Choose Command From drop-down list, select All Commands.
- From the list of commands, scroll down to find and highlight Shrink One Page.
- Click the Add button to add the Shrink One Page option to your Quick Access Toolbar.
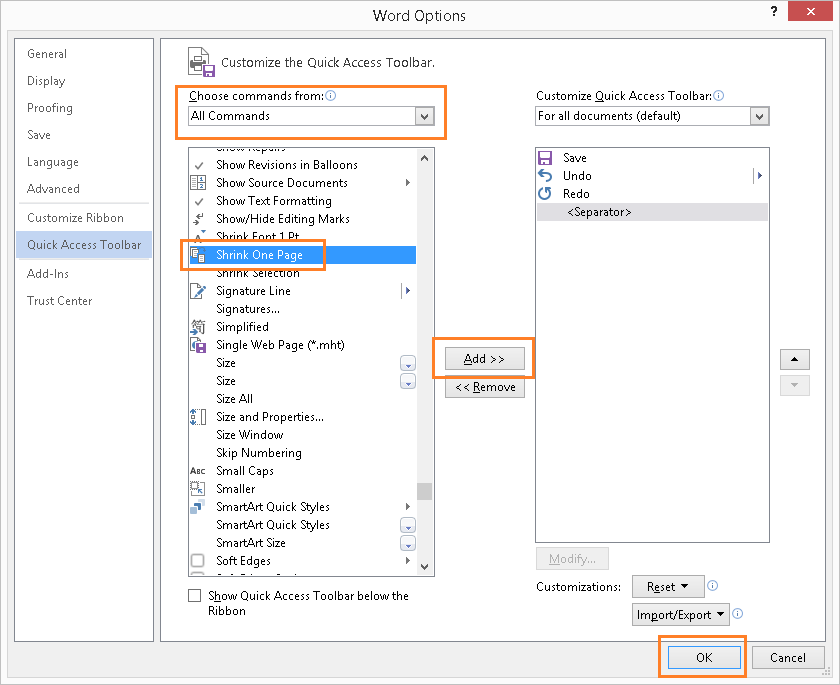
- Click OK to close the dialog box.
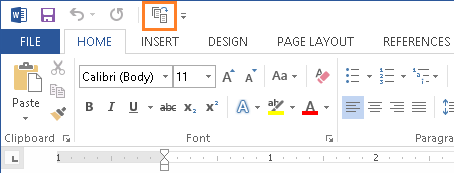
The Shrink One Page option is now accessible through your quick access toolbar. To use this feature, simply follow these steps:
- Highlight all the text in your Microsoft Word document (you can press CTRL + A)
- Then click on the Shrink One Page icon, as illustrated below.
6. Have Word Read To You
Microsoft Word has a built-in text-to-speech feature that is able to read your document to you. You'll be able to hear it speak your text out loud. Having Microsoft Word read aloud is a great feature for the visually-impaired. For others, this feature can be a time saving by having Word read to you while you are working on other things.
Before using it, we'll need to make the Speak icon accessible to us on our Quick Access Toolbar by performing this one-time setup:
- Click on the down arrow on the Quick Access Toolbar.
- Select More Commands from the list of options that appears.
- In the Word Options dialog box, from the Choose Command From drop-down list, select All Commands.
- From the list of commands, scroll down to find and highlight Speak.
- Click the Add button to add the Speak option to your Quick Access Toolbar.
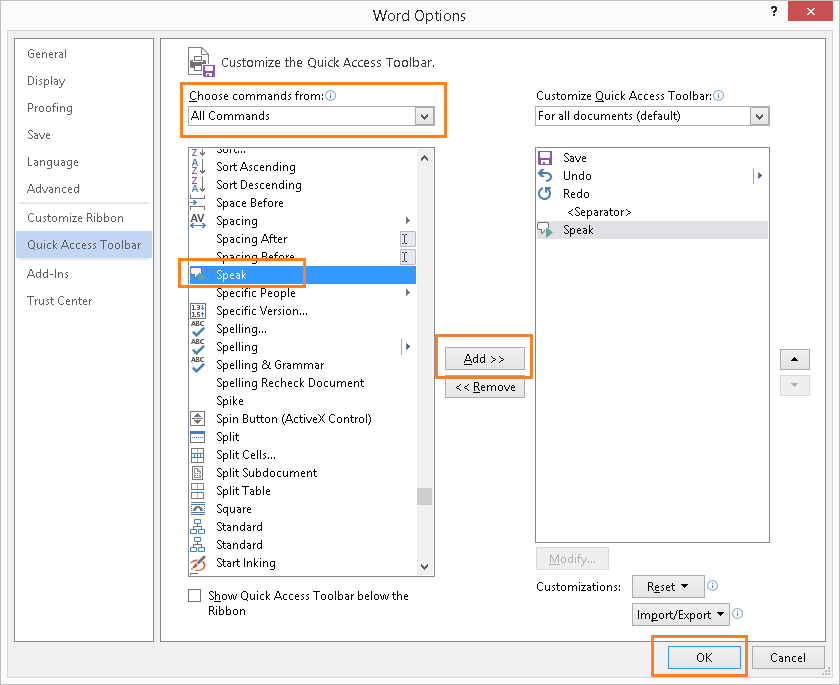
- Click OK to close the dialog box.
The Speak option is now accessible through your quick access toolbar. To have Word speak your text, simply follow these steps:
- Highlight the text you want Microsoft Word to read to you.
- Click on the Speak icon, as illustrated below.
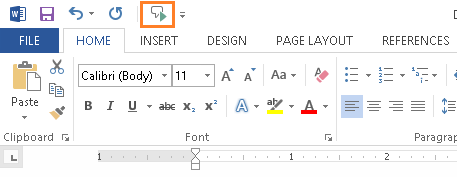
You can stop speak at anytime by clicking on the Speak icon again.
7. Add Random Text
At times, you may find a need to quickly add filler text into your Microsoft Word document preview your document flow or a set of document design format. Word allows you to use one easy-to-use command to quickly populate your document with English or Latin text.
rand()
The =rand() will quickly add a few paragraphs into your document. To use, follow these steps:
- In your document, position the Microsoft Word cursor (not your mouse cursor) where you want random text to be inserted. The cursor needs to be at the beginning of a line. It does need to be a blank line, the cursor just needs to be at the beginning. This command will not work if you attempt to use it within a sentence.
- Type
=rand()and press Enter. Random text is now added to your document as illustrated below.

rand(paragraphs, sentences)
The rand command allows you to customize the random text generated by specifying the number of paragraphs and the number of sentences per paragraph to created.
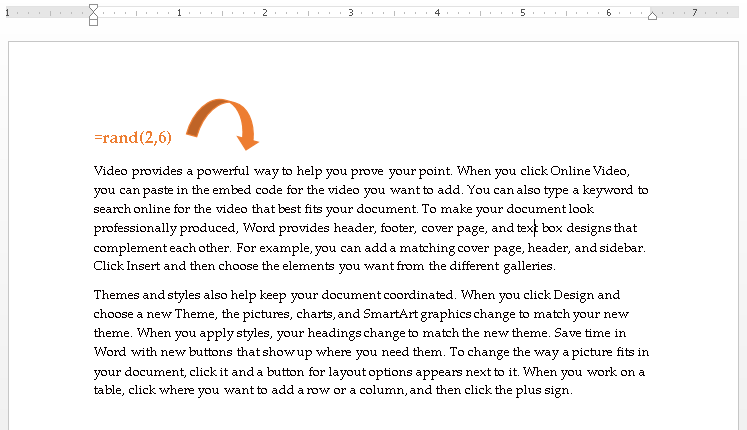
For example to generate 2 paragraphs with 6 sentences each, follow these steps:
- In your document, position the Microsoft Word cursor (not your mouse cursor) where you want random text to be inserted. The cursor needs to be at the beginning of a line. It does need to be a blank line, the cursor just needs to be at the beginning. This command will not work if you attempt to use it within a sentence.
- Type
=rand(2,6)and press Enter. Random text is now added to your document as illustrated below.
lorem()
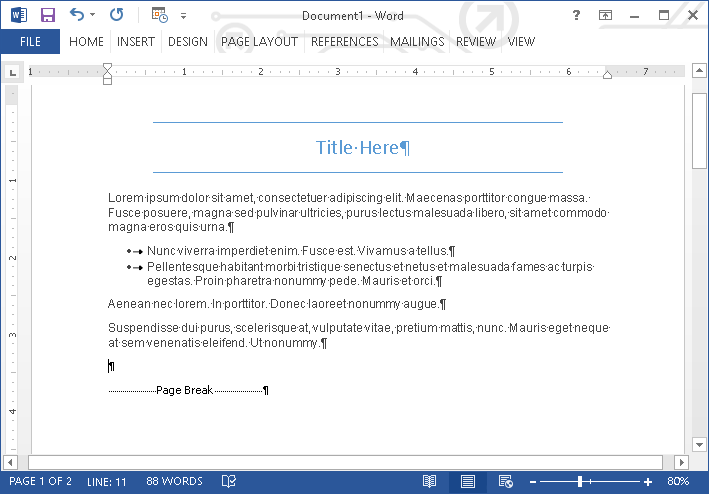
Instead of English text, you can use the lorem command in insert random Latin text. You use this command in the same manner as rand as illustrated above. In its simplest form type in =lorem() and press Enter.
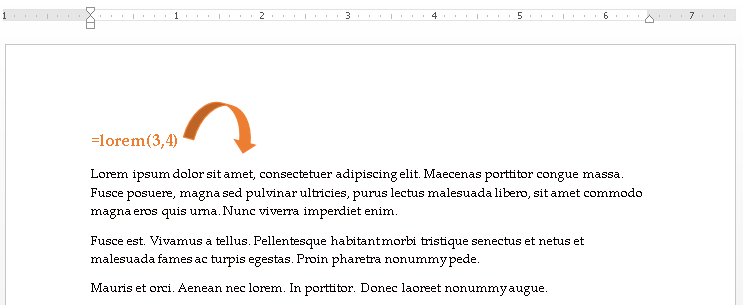
To specify the number of paragraphs and sentences to generate, use command syntax is lorem(paragraphs, sentences).As an example, to insert 3 paragraphs with 4 sentences each, type =lorem(3,4) and press Enter. The result is illustrated below.
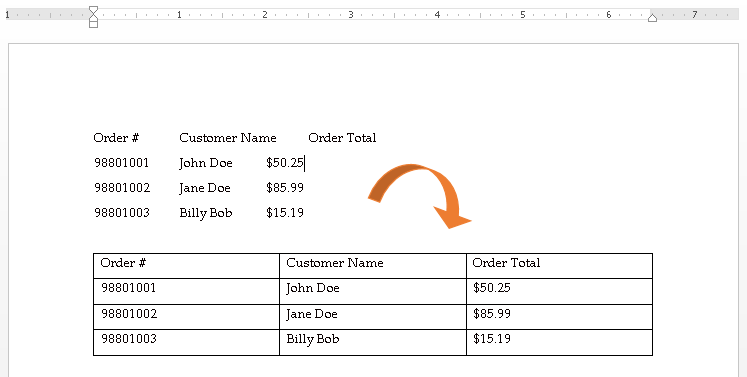
8. Convert Tabbed Text to Table
If you create rows and columns of text using tab, you can easily convert them into a table using the built-in Convert Text to Table feature in Microsoft Word. This feature will also work if you have a delimited list (e.g, comma delimited text). To use, follow these simple steps:
- In Microsoft Word, highlight your text.
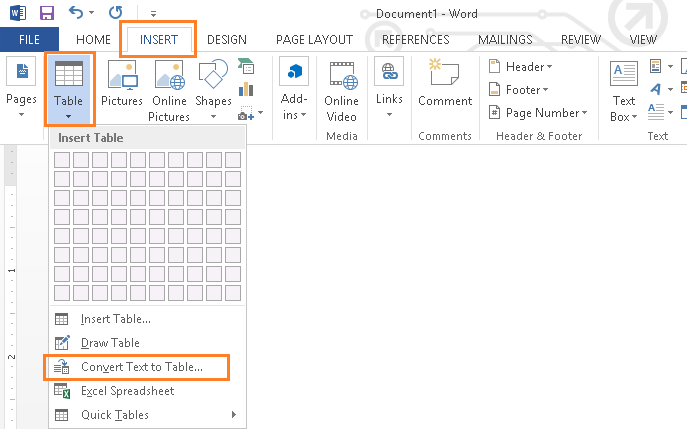
- From the menu bar, click Insert tab > Table > Convert Text to Table, as illustrated below.
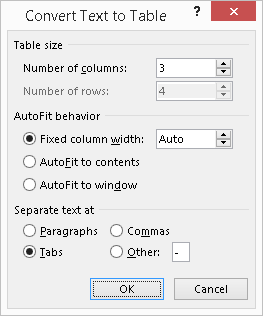
- In the dialog box that appear, define the criteria for the text you want to convert to a table then click OK.
- Your tabbed text (or delimited text) is now converted into a table, as illustrated below.
9. Insert Hyperlinks
You can add links to websites (or even to a different section of your document) into your document easily. This enables your reader to click on the hyperlink to go to the external resources. This is a great tool to use if you want to share or reference additional information from websites.
To insert a hyperlink, follow these steps:
- Highlight the text you make to make a hyperlink
- Press CTRL + K
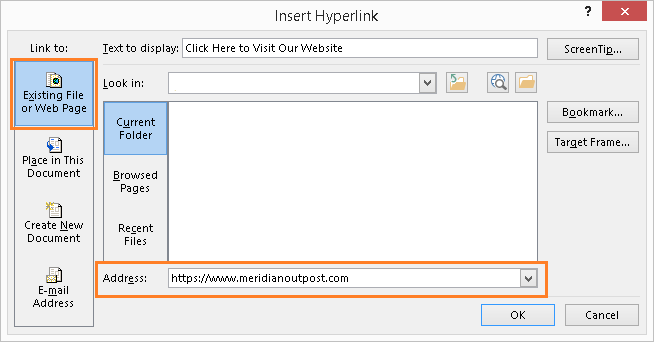
- In the Insert Hyperlink dialog box that appears, select one of four available choices
- Link to Existing File of Web Page
- Link to Place in This Document
- Link to Create New Document
- Link to E-mail Address
- Enter the URL or select the target destination for your link
- For links to a web page, enter the website address (URL), as illustrated below.
- For links to a place within your document, select the position from the list of available places
- For a link to create a document, specify the folder path for your new file
- For e-mail address, enter the email address in textbox provided
- For links to a web page, enter the website address (URL), as illustrated below.
- Your highlighted text will now turns to a blue clickable hyperlink. To test the link, hold CTRL then click on the link.
10. Insert Date/Time
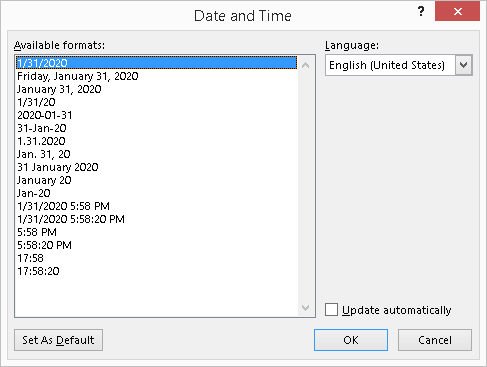
You can quickly insert the current date and/or time into your document with the Date & Time button. This feature enables to define whether to insert the current date only or with the time. You are also able to define the format of how the date and time should appear. This is a great time saver if you constantly need to add date or time into your document, such as for your work logs, laboratory workbooks, and similar.
Before using it, we'll need to make the Date & Time icon accessible to us on our Quick Access Toolbar by performing this one-time setup:
- Click on the down arrow on the Quick Access Toolbar.
- Select More Commands from the list of options that appears.
- In the Word Options dialog box, from the Choose Command From drop-down list, select All Commands.
- From the list of commands, scroll down to find and highlight Date & Time.
- Click the Add button to add the Speak option to your Quick Access Toolbar.
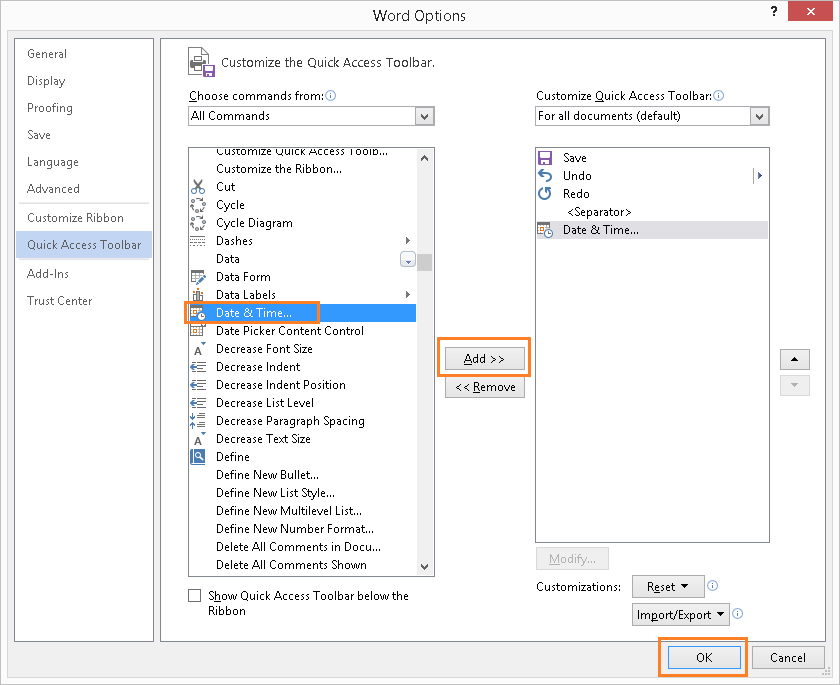
- Click OK to close the dialog box.
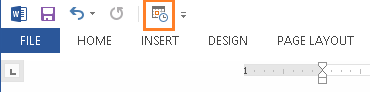
The Date & Time option is now accessible through your quick access toolbar. To have Word insert the current date and time into your document, simply follow these steps:
- Position your cursor in your document where you want to insert the file path.
- Click on the Date & Time icon, as illustrated below.
- From the Date & Time dialog box, select the format on how you want your data/time to appear then click OK.
The current data and/or time is now inserted into your document.
Back to Top11. Insert a File Path/Location
As you and your colleagues share Word documents with each other, you may find yourself needing to know where a particular document is saved. This is particularly the case if you have a printed copy of the document or the document was emailed to you as an attachment. By using the Insert File Path command in Microsoft Word, you can easily include the full file path of your document so others can locate it when needed (e.g., network file share).
Before using it, we'll need to make the Insert File Path icon accessible to us on our Quick Access Toolbar by performing this one-time setup:
- Click on the down arrow on the Quick Access Toolbar.
- Select More Commands from the list of options that appears.
- In the Word Options dialog box, from the Choose Command From drop-down list, select All Commands.
- From the list of commands, scroll down to find and highlight Insert File Path.
- Click the Add button to add the Speak option to your Quick Access Toolbar.
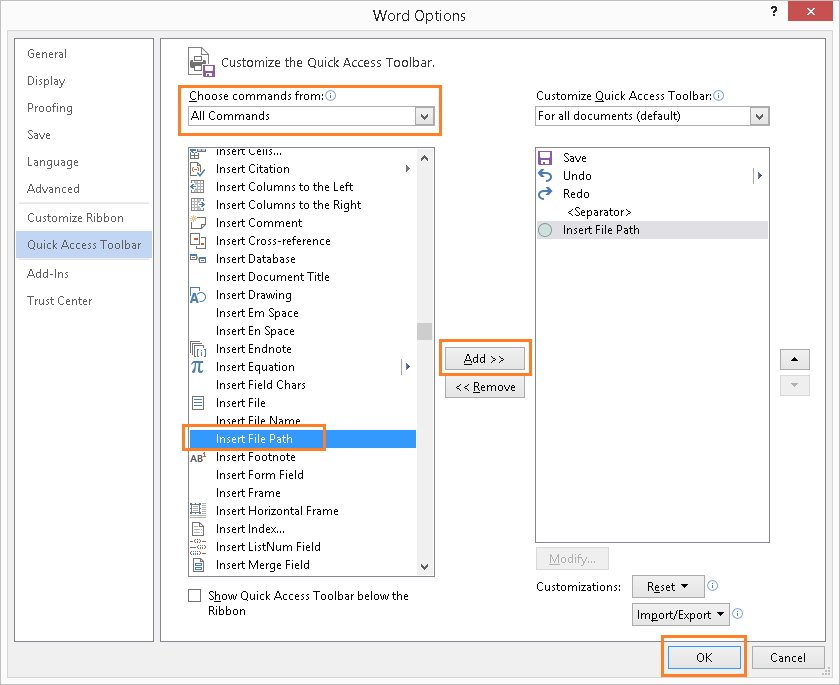
- Click OK to close the dialog box.
The Insert File Path option is now accessible through your quick access toolbar. To have Word insert the file path of your document, simply follow these steps:
- Position your cursor in your document where you want to insert the file path. A good spot may be on your cover page or in the document footer.
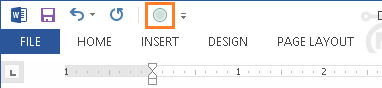
- Click on the Insert File Path icon, as illustrated below.
Your document's file path is now inserted into your document.
Back to Top12. Insert a Screenshot/Screen Clipping
Microsoft Word includes a built-in feature to enable you to easily insert a screenshot (or screen clipping) into your document without the need of using the Print Screen key on your keyboard and then using Microsoft Paint to crop your image. This feature provides you with a list of selectable thumbnail preview of the windows you have open (windows that are minimized will not be included in this list).
To insert a screenshot into your Word document, follow these steps:
- In your Microsoft Word document, position the cursor where you want the screenshot to be inserted.
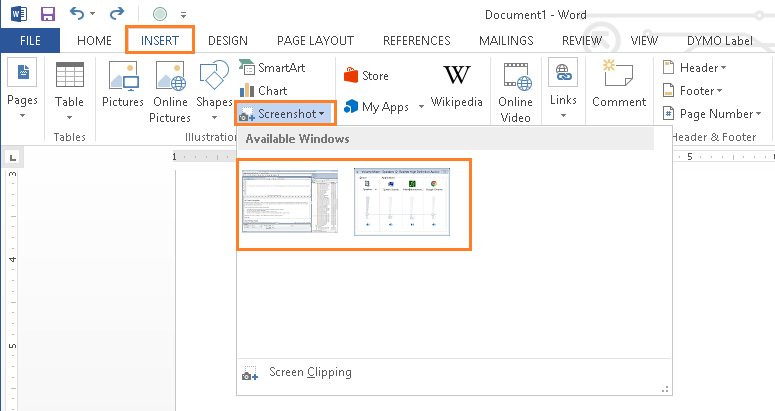
- From the menu bar, click on Insert > Screenshot.
- From the list of thumbnail images, click to select the screenshot you want to insert, as illustrated below.
- Your screenshot is now inserted and you can resize and re-position as needed.
Screen Clipping
If you need the ability to manually select a specific area of your screen to capture and insert into your document, use the Screen Clipping feature. You'll be able to select a rectangular area of your screen to capture and insert.
You access this feature as follows:
- In your Microsoft Word document, position the cursor where you want the screenshot to be inserted.
- From the menu bar, click on Insert > Screenshot > Screen Clipping.
- Using the drawing pointer that appears, draw a rectangular area of your screen to capture.
- Your screenshot is now inserted and you can resize and re-position as needed.
13. File Share Email
If you are like most, you will often need to share your Microsoft Word documents with your team or colleagues for peer review, edits, and feedback. With the Share feature in Microsoft Word, you can quickly and easily attach open Microsoft Outlook and attached your document with a few clicks of the mouse.
Follow these steps to use this feature:
- While in Microsoft Word, click File > Share > Email.
- Click Send as Attachment.
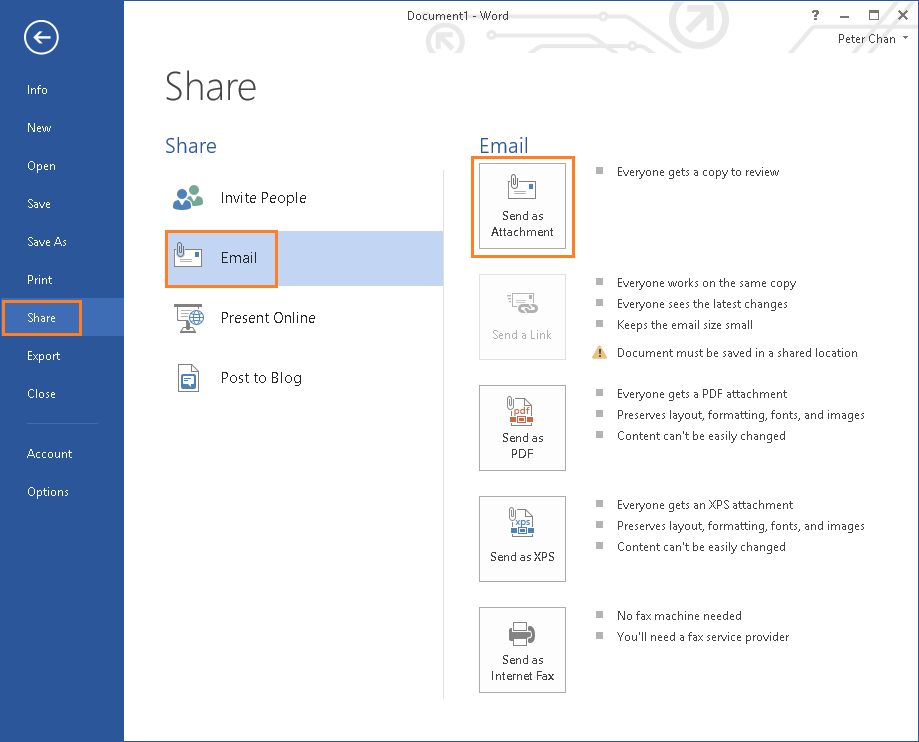
An Outlook new message window will automatically open with your document attached.
14. AutoCorrect
The AutoCorrect feature can be used to automatically insert frequently used text or sentences with a simple short keystroke combination. Long disclaimer statements, reference terms, and any other long series of text can easily be inserted by typing in just a few letters.
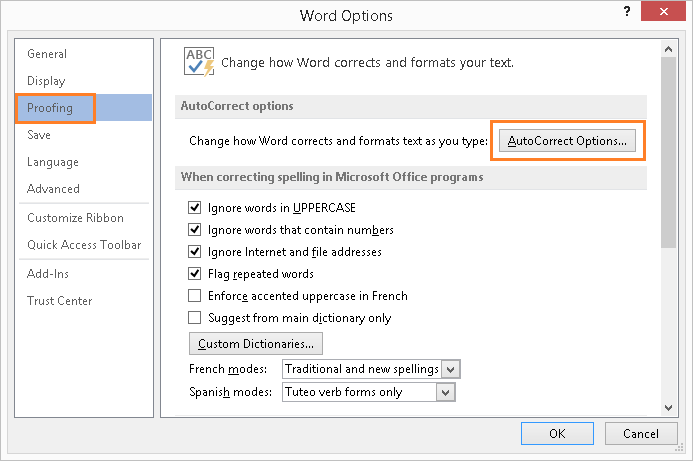
- In Microsoft Word, click on File > Option.
- In the Word Options dialog box, select Proofing from the left side bar.
- Then click the AutoCorrect Options button.
- In the AutoCorrect dialog box, type in a short key stroke combination you want to use and type in the sentence(s) you want Word to automatically replace it with. In the example below, we use the key strokes
!safeto have Word insert the sentenceSafety is our #1 priority and everyone's responsibility!
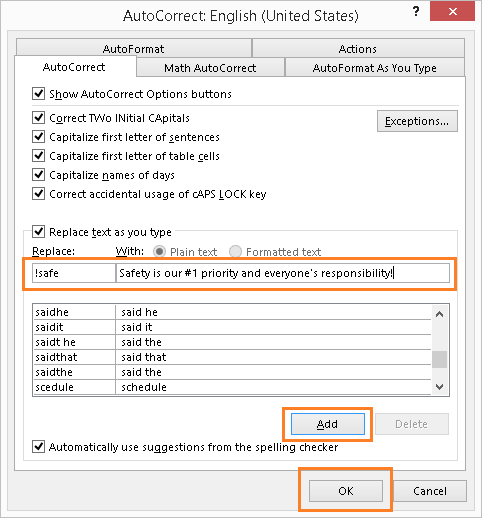
- Click Add and the OK button.
Now, as you edit your document, when you type !safe and press Space Bar, Word will automatically replace it with Safety is our #1 priority and everyone's responsibility!
This is a quick and easy shortcut to type in repetitive text into your documents.
Back to Top15. Triple Click to Highlight a Paragraph
This tip quickly highlights the entire paragraph. Simply triple click on your left mouse button anywhere within a paragraph to highlight.
Back to Top16. Show Formatting Marks
There are many formatting options in Microsoft Word that you can use to make your document look perfect. These include spaces, tabs, and page breaks. Why many of these are visible as you edit your document, there are some that are not. This can be a cause of frustration if you are trying to format text but are not getting the desired effect as invisible formatting are working against you.
You can have all the formatting options used in your document become visible by using the show/hide formatting mark option in Microsoft Word. Do one of the following to show and hide the formatting marks.
- Click on the paragraph symbol ¶ on the toolbar to show/hide, as illustrated below.
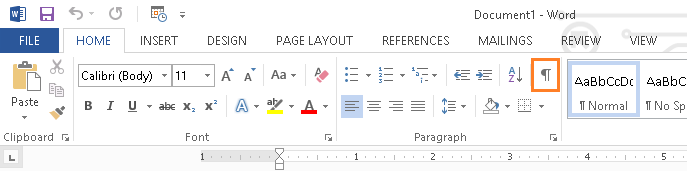
- Or press CTRL + SHIFT + * to show/hide.
Once displayed, formatting marks are shown, as illustrated in the example below.